
Hosting a backend web service with NGINX as the front end is one of the best ways I have found to create a safer and easier managed environment for the public. NGINX is a very powerful and capable front-end web server that does what it needs to do quickly and efficiently. In this article, I will outline how to get a basic Wakanda setup running with an NGINX frontend forwarding the Wakanda backend site.
In this article, I focus on getting Wakada hosting the REST component of the server. I will later come back and show how to also get this NGINX server to host the front end of Wakanda.
I plan to show you how to get a basic setup up running on a hosting Linux server. We will use the most recent version of NGINX available for the Ubuntu Linux distribution. We will use the Ubuntu distro due to its being supported by the Wakanda system.
Starting this process with a clean new Ubuntu Server installation. We will use Ubuntu 17.10 Server, other versions should work the same. In my example, I am Using Ubuntu server running in a Parallels environment.
Once you have your basic standard server setup and running. you should be able to login to the server image and start by installing NGINX.
Install NGINX on your machine
Type the following commands as a standard user where your account is a member of the admin group.
sudo apt-get install nginx
Once you type this you should see the following.

And finally, if you have NGINX install correctly you should see the following screen. If you point your browser to the Ubuntu computer you should see the following.
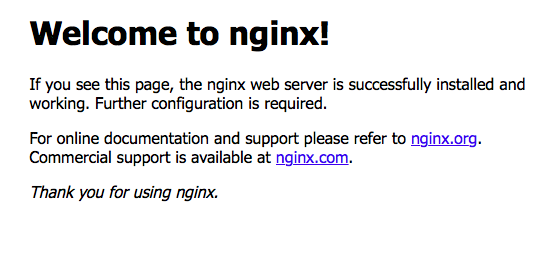
If you see this in your web browser you have successfully setup NGINX. If you had a problem please check the NGINX.org website for more or better instructions on installing NGINX.
Installing the Wakanda Server
You will now need to download Wakanda from the Wakanda website and copy the installer to your Linux server. Since we are installing on Ubuntu which is a Debian based distro it is easiest to use the .deb installer.
Prior to installing you will need to make sure you have the Libcap-ng library installed. If you do not then you will be prompted and the installation will fail.
To install this file type the following.
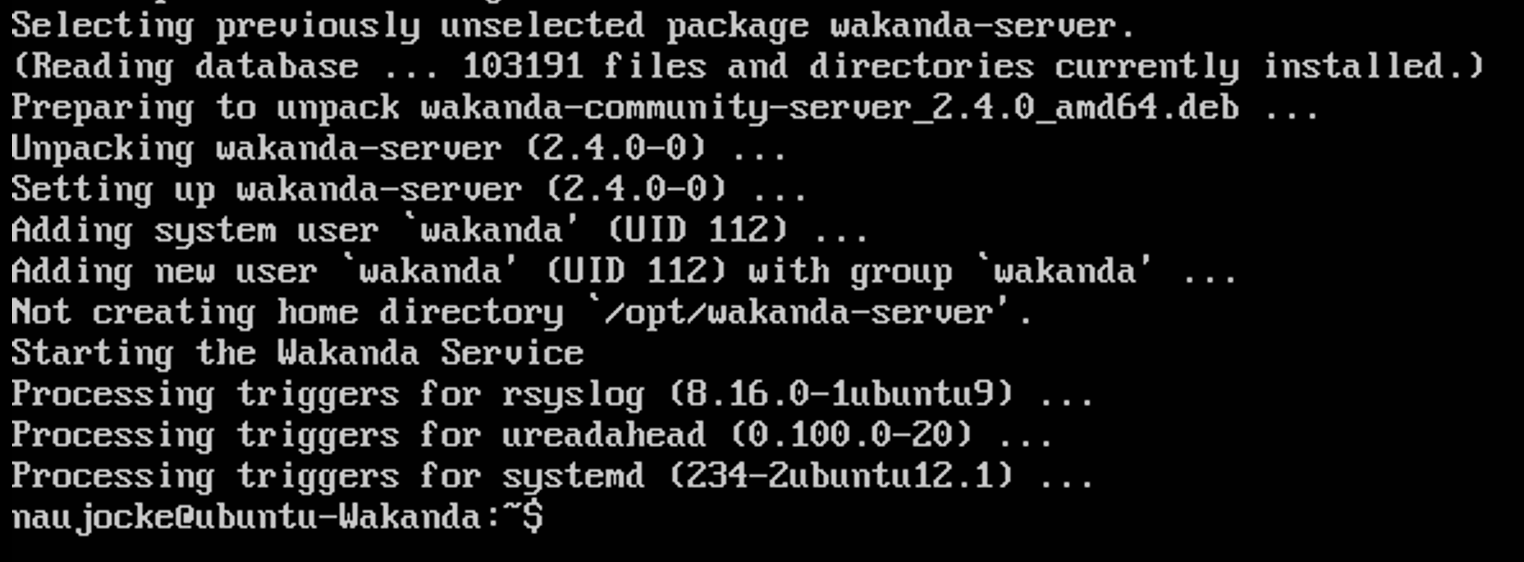
sudo dpkg -i wakanda-community-server_2.4.0_amd64.deb
This should install the community version of the Wakanda server. If you are looking for the enterprise server you would substitute enterprise for the community. The 2.4.0 is the current latest version. If you typed this in right then you should see the following or something similar to it.
Once you have done this you should see a process running that looks like the following.
ps -ef
You should see a line in the returned text containing the following
/usr/local/bin/wakanda-server --daemon --pid=/tmp/wakanda
If you have the enterprise version of Wakanda then you will be able to go to localhost:8080/admin and see the administration screen for the server. If you are using the community version then you will need to have a project first.
Create your starting Wakanda Project.
You will need to create your Wakanda project on either a Windows computer or a Macintosh.We will create a new project and upload it to the server. This project will be the back end and will only have a very simple database. The same technique will be used to upload a larger or more complex project. In later articles, I will be using this base as a starting point.
I am going to call my project "BasicProject".
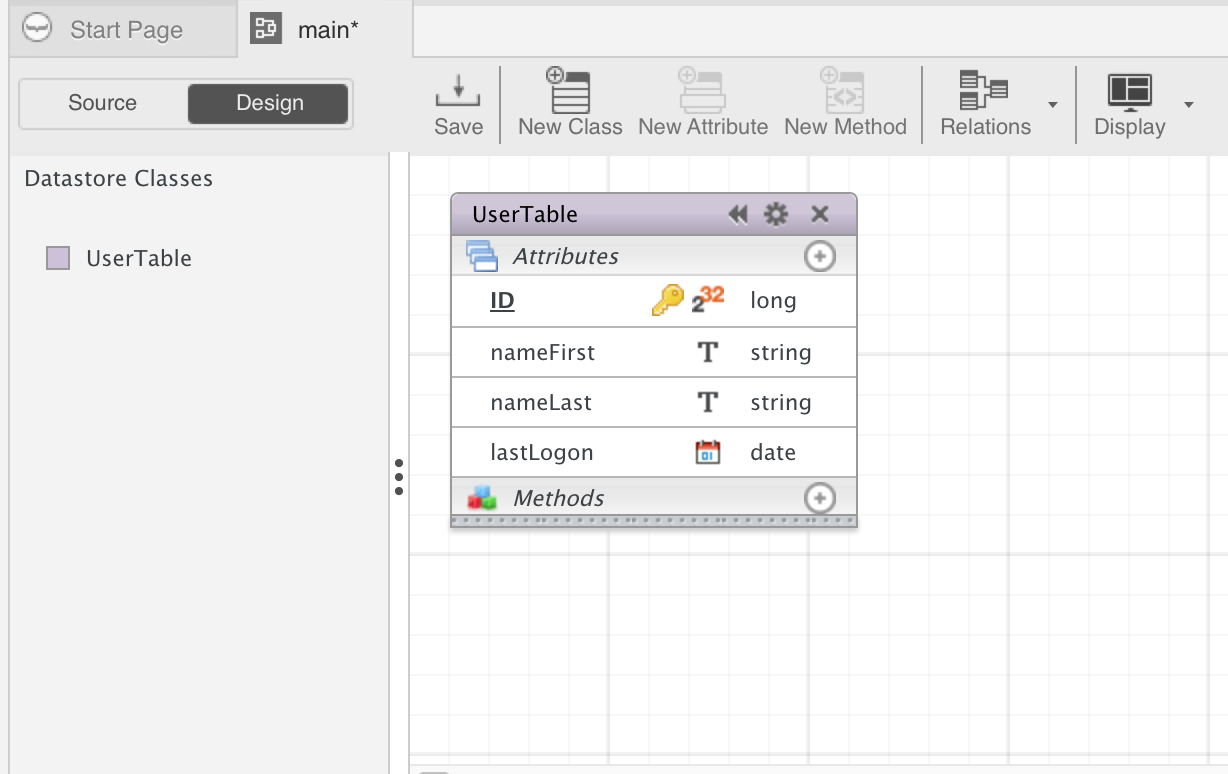
I will create a very simple Model in the /models/main/model file.
This model contains a name and a date just to keep things simple.
Next, update the configuration of my settings file.
We will need to set the IP address of the server to serve our responses up on localhost:8081. If we don't then your NGINX configuration will not work right. Wakanda will serve the IP address localhost and NGINX will server on the public IP address. The Wakanda default port number for the Backend is 8081. If you choose to run multiple Wakanda backends in one project make sure you have used different ports for each solution. Usually, in my projects where I have multiple Wakanda projects running, I will use ports number sequentially from 8081.
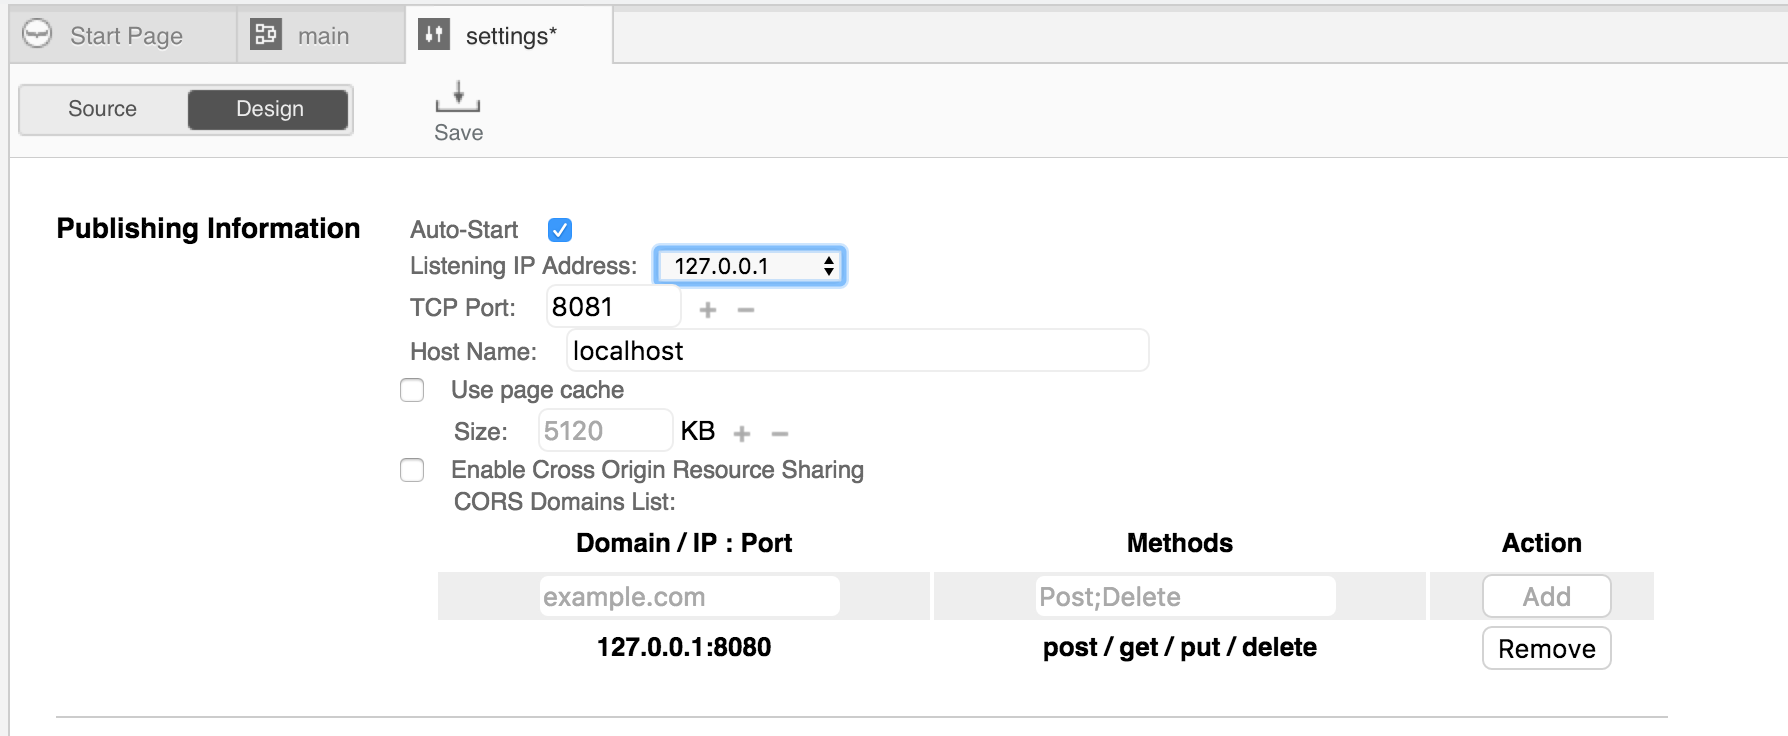
NOTE: the highlighted Listening IP address. you will need to make sure it is set to 127.0.0.1. If you do not you will get port conflicts and it will not work.
Once this is done then you should be able to run the backend and using your web browser be able to browse the contents of the project backend.
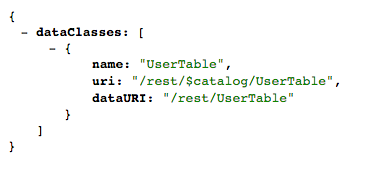
You should be able to type the following into the URL. Since we are running locally you may want to use a broswer like Lynx to view the given URL. You can save the JSON data that the browser will download to a file on the computer.
http://localhost:8081/rest/$Catalog
You should get the following response. This assumes you are using the project we created above.
{
dataClasses: [
{
name: "UserTable",
uri: "/rest/$catalog/UserTable",
dataURI: "/rest/UserTable"
}
]
}
If all worked well then we should be able to copy the project to our Linux server.
Copy the Project to your server and get it running
Use your preferred method of coping the project. I will tar the project and SCP the file to the server.
See my note Copying a project from OSX to a Linux Wakanda server about using TAR to compress a project and coping it to a new server.
Once I have the folder on the server I will move it to the destination folder. Usually, I use /opt for the destination for the project.
sudo mv BasicProject /opt
You will also need to make sure the folder is owned by the Wakanda server. Usually, you may need to use the following on the project to set the ownership. If you do not then Wakanda will not be able to start the project.
sudo chown -R wakanda:wakanda /opt/BasicProject
It is important that prior to testing we make sure that the Wakanda server is not running so we don't have a conflict. Use the following to shut it down. By default, Wakanda will launch on startup.
sudo /etc/init.d/wakanda stop
This will set the ownership of the Wakanda project. Now we will see if you have the folder in the right place. If we have done so then we would be able to start the project using the following command.
sudo wakanda-server /opt/BasicProject/app.waSolution
If you do everything right then you will see the following on your screen. The Administration Web Server is a server available to enterprise license users that give a number of tools to help in managing your Wakanda database and backups.
naujocke@ubuntu-Wakanda:/opt/solutions$ sudo wakanda-server  /opt/solutions/BasicProject/app.waSolution
Welcome to Wakanda Server 2.4.0

Publishing "BasicProject" solution

The solution's log file will be stored in the "/opt/solutions/BasicProject/Logs/" folder

- The Administration Web Server listens for connections on port 8080 on all IP addresses. Note that unsecured remote connections will be refused

- "backend" project listens for connections on port 8081 on localhost
You should now be able to use LYNX or your preferred browser on the server to see the backend though localhost:8081. In the case of this project.
lynx localhost:8081/rest/UserTable/$catalog
Lynx should prompt you to download and save the JSON file you will be sent. If all works well then you should see the following in your UserTable file.
{"__entityModel":"UserTable","__COUNT":0,"__SENT":0,"__FIRST":0,"__ENTITIES":[]}
If this has been successful you well on your way. Next, all we need to do is hook up the NGINX server to use this Wakanda server. Since we just created a new database there is no data stored. Otherwise, we would show records in our table.
Configure Wakanda to load our project automatically.
You will find the there are several places where Wakanda keeps resources. In order to tell Wakanda to start a project in a specific place on startup you only need to edit this one file.
sudo vi /etc/default/wakanda
This is the startup file for Wakanda and to set it to autostart you will just uncomment the line then add the path to your .waSolution file. When you start a solution it will start all the configured backends by default. There is a setting in the backend configuration file to prevent this.
wakanda_opt_solution="/opt/solutions/BasicProject/app.waSolution"
When you start Wakanda it will that start up and load your project.
/etc/init.d/wakanda start
You should now be able to do the same request with Lynx we used above and get the same response.
Configure NGINX to use the running Wakanda project.
We need to have NGINX call our Wakanda project for all requests to the backed of Wakanda server. We will have the NGINX server work on the front end of the server serving content to the public. The nice thing about this is that if you add more advanced features to NGINX the Wakanda project will not need to know anything about the changes. You will also be able to use the NGINX features to assist in managing your Wakanda backend.
Just for safeties sake, I will check that the Wakanda server is only running on the localhost IP address for the server. We can do this using the netstat command. As you can see the Wakanda process is listening on IP address 127.0.0.1:8081. This is exactly what we want. If it was listening on 0.0.0.0:8081 then we would have a problem.
The configuration file where the settings can be found is located in the following file. Each backend in Wakanda will have its own configuration file.
/opt/solutions/BasicProject/backend/settings.waSettings
naujocke@ubuntu-Wakanda:~$ sudo netstat -plnt
Active Internet connections (only servers)
Proto Recv-Q Send-Q Local Address           Foreign Address         State       PID/Program name
tcp        0      0 0.0.0.0:5355            0.0.0.0:*               LISTEN      698/systemd-resolve
tcp        0      0 0.0.0.0:80              0.0.0.0:*               LISTEN      5847/nginx: master
tcp        0      0 127.0.0.1:8081          0.0.0.0:*               LISTEN      11118/wakanda-serve
tcp        0      0 0.0.0.0:22              0.0.0.0:*               LISTEN      1154/sshd
tcp6       0      0 :::5355                 :::*                    LISTEN      698/systemd-resolve
tcp6       0      0 :::8080                 :::*                    LISTEN      11118/wakanda-serve
tcp6       0      0 :::80                   :::*                    LISTEN      5847/nginx: master
tcp6       0      0 :::22                   :::*                    LISTEN      1154/sshd
Now that we know that our project is only running on localhost we will configure the service block for NGINX.
I for this exercise I will work with the default server. Append a new block for the moment to the default server in my NGINX setup. You really should be set up this in a separate site configuration file. This is the new block I will add the default server.
I have added the more set headers to deal with CORS issues. You will still have to adjust the CORS settings in the wakanda solution. But this fixes the problem of CORS proxy.
server {
        listen 172.16.18.232:8081;
        server_name wakandaBackend.localhost;
        more_set_headers "Origin:wakandaBackend.localhost";
        location / {
                include proxy_params;
                proxy_pass http://127.0.0.1:8081;
        }
}
The include proxy_params is the default proxy parameters file install by NGINX. The rest is really a minimal block. I am using the IP address of the Ethernet interface so we can use the same port number The idea is that this should be invisible to the guest browser.
If everything is correct and re-restart NGINX we should see the following open ports on our server.
Active Internet connections (only servers)
Proto Recv-Q Send-Q Local Address           Foreign Address         State       PID/Program name
tcp        0      0 0.0.0.0:5355            0.0.0.0:*               LISTEN      698/systemd-resolve
tcp        0      0 0.0.0.0:80              0.0.0.0:*               LISTEN      21401/nginx: master
tcp        0      0 172.16.18.232:8081      0.0.0.0:*               LISTEN      21401/nginx: master
tcp        0      0 127.0.0.1:8081          0.0.0.0:*               LISTEN      11118/wakanda-serve
tcp        0      0 0.0.0.0:22              0.0.0.0:*               LISTEN      1154/sshd
tcp6       0      0 :::5355                 :::*                    LISTEN      698/systemd-resolve
tcp6       0      0 :::80                   :::*                    LISTEN      21401/nginx: master
tcp6       0      0 :::8080                 :::*                    LISTEN      11118/wakanda-serve
As you can see the NGINX process is listening to the IP address of the ethernet interface while the Wakanda project is listening to the same port number on localhost. If you point your browser to the IP address you should get the same response back that we were getting when we connected to Wakanda using Lynx on localhost. If you check your logs in /var/log/nginx/access.log you would see your browser connect to the server and send back the response from Wakanda. you do want to make sure that you use the correct URI. If you neglect to do this then you will not get an answer from Wakanda.
http://172.16.18.232:8081/rest/$catalog
While we could have been less specific IP address and instead used a different port number this allows for the NGINX proxy server to be able to run interference for the browser and help protect you Wakanda Backend from unexpected attacks that may come its way.
Summary
Setting up a Wakanda backend with an NGINX server providing frontend support is really not difficult. Hopefully, this tutorial will help you in your adventures with using Wakanda and NGINX. If you have any feedback or suggestions please feel free to contact me at my email address.